
Essential Avalanche Safety and Rescue Equipment
By Connor Chilcott
IFMGA Mountain Guide

Practicing avalanche rescue during an AIARE Level 1 Course
One of the most obvious concerns for backcountry skiing is avalanche safety, and there are a few crucial pieces of gear that every backcountry traveler should carry. Even if you only intend to venture into relatively safe terrain, carrying this life-saving equipment is important because the unexpected can always happen. Here are the essentials for avalanche safety and rescue, which I’ll discuss in more detail below:
Beacon
Shovel
Probe
Tarp
Repair Kit
First Aid Kit
Satellite Communication
Navigational Tools
Of course, knowing how to use the gear is essential, too. Your beacon, shovel, and probe are the main tools you need to rescue someone from the debris of an avalanche, but they only work if you know how to efficiently use them to locate and recover a victim. That’s why taking an avalanche safety course is another important step in staying safe while backcountry skiing.
Beacon
A beacon or avalanche transceiver is the tool we use if everything goes wrong. Our goal in the backcountry is to have the knowledge to avoid avalanches entirely. However, it is always possible to make mistakes or end up in the wrong place at the wrong time. Carrying a beacon paired with other avalanche rescue equipment is the standard and needs to be carried on every backcountry tour.
I replace my beacon every 5 years. It is a mini computer so you need to take care of it. Store inside, remove the batteries after Winter, and don’t drop it. Treat it like your phone and it will last longer.

A few notes on beacons:
Must be 3 Antenna
New (don’t buy a used beacon)
Read the manual!
Some beacons have a search range of up to 70 meters, some are 50 meters.
Understand the different functions of your beacon.
Recommended models:
Shovel
Shovels come in many shapes, sizes, and weight. A shovel is used for many things in the backcountry. It’s first and foremost job is to be able to dig a partner out if they are buried under the snow. However it is also used to dig and look at the snowpack, assist in building an emergency shelter, or help improve the skin track or trail.

A few notes on Shovels:
Must be Metal — NO plastic shovels
The handle must detach from the blade. This allows you to easily store it inside your backpack.
Adjustable length for the handle.
Lightweight.
There is an argument to get a shovel with a large blade. I find I can move the same amount of snow with a smaller blade. You are not moving as much snow, however you can dig faster as each shovel load will weigh less.
Recommended shovels:
Probe
A rescue probe is basically a collapsible aluminum or carbon stick. After locating the victim under the snow with your beacon, you then use your probe to strike the victim under the snow. This is how you know where to start digging. Outside of using it to find an avalanche victim, it is also used to track snow depth. This can be very useful if tracking things such as a wind slab avalanche problem or a persistent slab problem in the snowpack.

A few notes on probes:
Aluminum or Carbon, Carbon is lighter, however aluminum is more durable and less expensive.
Length: The length of your probe depends on the snowpack you will be traveling in. Deeper snow = longer probe. I find a 270 cm probe is the best size to buy.
Examples of probes:
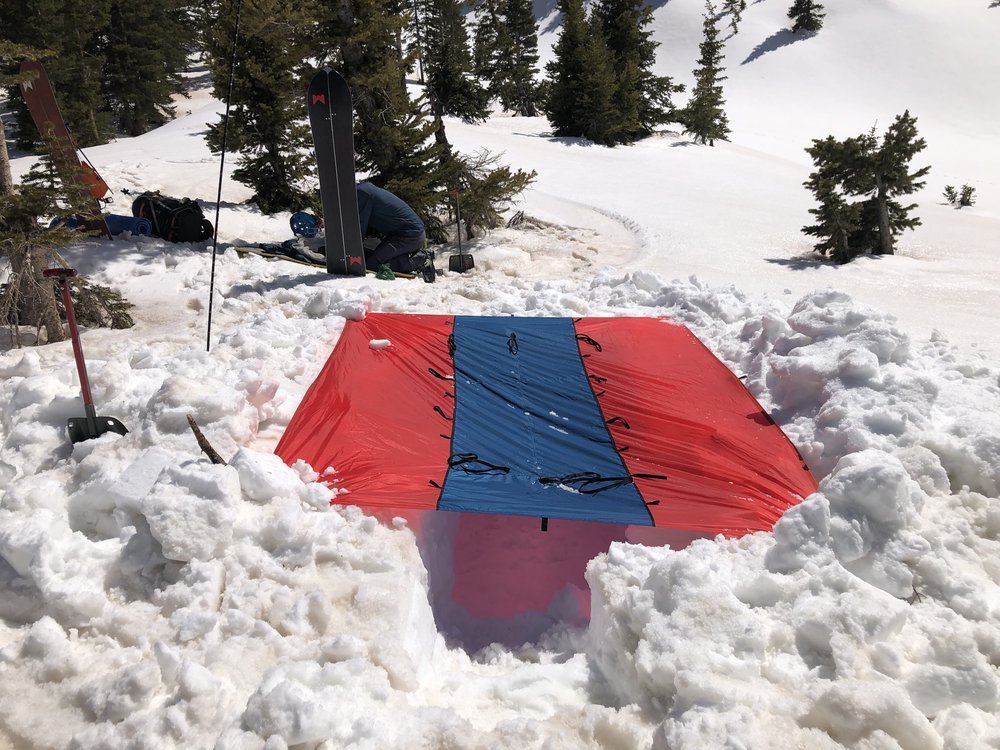
Tarp
A tarp or rescue sled is an extremely versatile rescue tool. You can use it drag an injured victim a short distance to the trailhead or helicopter landing zone. You can use it to create a snow shelter. It is pretty amazing how much warmer and insulated a shelter can be with a simple tarp. It could make the difference of whether or not a minor injury turns into hypothermia.
Some notes on tarps:
Lightweight
You want to have the ability to drag someone a short ways. Have the tarp paired with the necessary cord needed to tie it together and drag the individual
Compact (the tarp mostly lives in your backpack, so its nice when it does not take up to much room.)
Not everyone in the group needs this. This is group gear and you need one per group.
Examples of good rescue tarps and sleds.
Repair Kit
A good repair kit is needed in every group for backcountry skiing. Having one per group is sufficient, but having things specific to your own bindings is necessary. Imagine if you break a binding in deep snow, far in the backcountry. I’ve seen everything from poles snapping in half, skins glopping, bindings ripping out, you name it. And it especially sucks while you’re out on a tour or hut trip that is far away from the nearest repair shop.
We have a full blog post about what to carry in your repair kit here: How to Build Your Backcountry Ski Repair Kit
First Aid Kit
A good first aid kit is needed in every group while recreating in the backcountry. We don’t want to overdo this as it can become very heavy. When I am stocking my first aid kits I think of these things.]:
Musculo-skeletal injuries: This is the most common injury while skiing. It is important to have the necessary equipment and know how to properly split the injury.
Heavy bleeds: Heavy bleeds are always a possibility with high velocity sports. Carrying things such as quickclot and gauze, and understanding how to create a pressure dressing is necessary.
Medications: Ibuprofen, Tylenol, Aspirin, and Benadryal are the most common over-the-counter medications we carry in the backcountry. You can always carry more based on your understanding of the drugs and their uses.
Blisters: These are very common, especially with newer boots. Always take care of hot spots prior to them becoming blisters. Don’t hestitat to stop and fix these problems early. I find things like leukotape and second skin to be the best options.
If you are unfamiliar with backcountry first aid, consider taking a wilderness first aid or wilderness first responder course.
Satellite Communication
With the technology out these days, we should all be carrying some form of satellite communication device. These can save lives, and have many times since becoming readily available to recreationalists. It is good to make sure your communication device is working before leaving cell phone signal. I prefer having a two-way communication device. This way I can text to let Search and Rescue know what is wrong, what resources are needed, and how urgent the issue is.

Examples of SOS devices:
This is the best device currently on the market. It connects to your phone and is very easy to use. It has two way communication so you can send and receive text messages.
I-Phone IOS 18
This has just been released and I have not gotten to play around with it. However, it is supposed to have the capability to send messages and call for S.O.S via satellite. Research this prior to depending on it.
Navigational Tools
Plain and simple, this is your cell phone. Having the correct apps downloaded along with downloading maps for offline use is crucial. Choose an app that works best for you, and consider carrying a spare battery charger in case your phone dies (they often do in the cold).
Recommended navigation apps:
Gaia GPS: By far my favorite app for navigating in the backcountry. It is simple and has never let me down.
Cal Topo: I mostly use this app at home while creating my tour plan. It is very easy to create and download your route using CalTopo then upload it into Gaia. However, a lot of people rely on CalTopo as a do-it-all navigation app for tour planning and backcountry navigation, and find it to work just fine.
On-X Backcountry: This is a powerful mapping tool that partners with Beacon Guidebooks. You’ll find ski tour tracks and descriptions already programmed into the app, along with ski-specific terrain layers like current avalanche forecasts and Avalanche Terrain Exposure Scale (ATES) modeling. These advanced features make planning a tour and navigating all that much easier.
All of this equipment together might seem like a lot to carry every time you go into the backcountry, but really it’s not that much to fit in a 30L or even 20L backpack. The bulkiest item is the shovel, and even this will slide easily into your pack as long as it has a detachable handle. Your entire avalanche rescue kit, first aid, and repair kit should still leave plenty of room for other essentials like food, water, and extra layers in your pack. For more tips on choosing your backpack and loading it for a big day out, check out my article What to Pack for Backcountry Skiing. After that, you will be fully prepared to pick out and purchase your gear, then start practicing to use it!